How To Convert Your Blog To An App Using Phonegap
This tutorial shows you how to convert a JavaScript web application into an iOS application with PhoneGap, as well as manually with Cordova CLI.
Last week we published our tutorial on Converting Your JavaScript App to an Android App with PhoneGap. Showing no favoritism, in this blog post, we'll walk you through how to launch your JavaScript app on the iOS App Store with PhoneGap. We'll show you how to take any JavaScript app and make it mobile ready for iOS devices.

Prerequisites
First, you'll need an OS X running Intel-based Mac. Just like the previous tutorial with Android, you have two options to make your JavaScript web app into an iOS app using PhoneGap. You can either use the PhoneGap Build Cloud, or the PhoneGap Cordova CLI. We'll walk through both.
When compared with Android development, this supposedly easy way to build your app using PhoneGap Build service is actually not so easy with iOS. There are no open tools, so you must to go through some steps before you start.
iOS Developer Program Set Up
- Register for iOS Developer Program (and pay $99 annual fee)
- Download and install Xcode
- Register your Apple ID in Xcode, at Preferences > Accounts
- Go to your Apple developer portal
- Click Devices to register your iOS device. You need to connect your device to iTunes to obtain your UUID
- Click Certificate
- Create a certificate for Production (to use PhoneGap Build, otherwise Development)
- Download the certificate
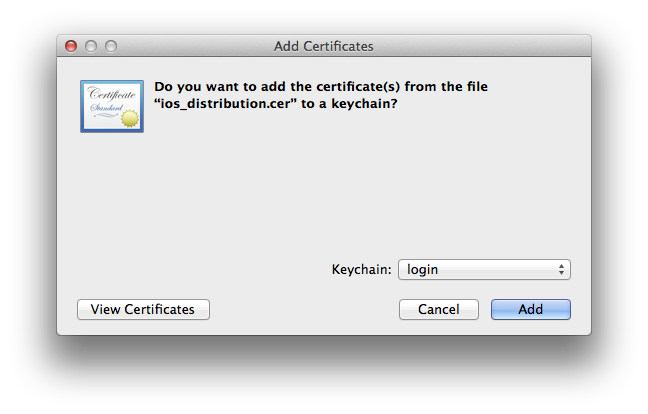
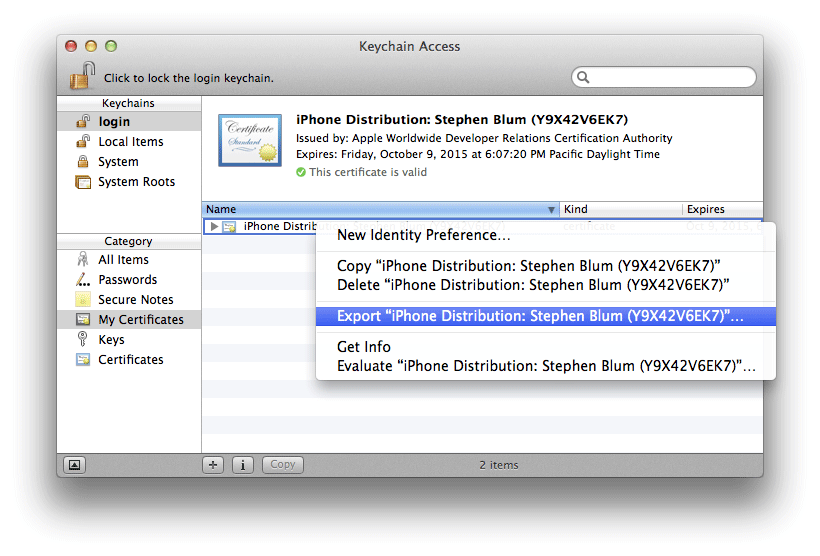
- Convert the certificate to a p12 file (See the screenshots below) – Double-click the .cer file to open it in Key Chain Access. Then click My Certificates under the category, Ctrl-click the certificate and export. When you save the .p12 file, you are asked to create a password that you will need later.
- Create a provision file on Apple developer portal, then download. Again, to make this work on PhoneGap Build, you need one for Distribution, otherwise Development.
 Now that that's all finished, let's move onto PhoneGap Build.
Option 1: Build Your iOS App on Cloud with PhoneGap Build
This step is almost same as the previously explained in my Android article, except you need to upload the downloaded certificate p12 file, and provisiong file too.
- Upload your zipped web app to PhoneGap Build cloud.
- Click Ready to build to build, then edit the name of the app and uplad an app icon too.
- Click iOS tab. You should see it in red
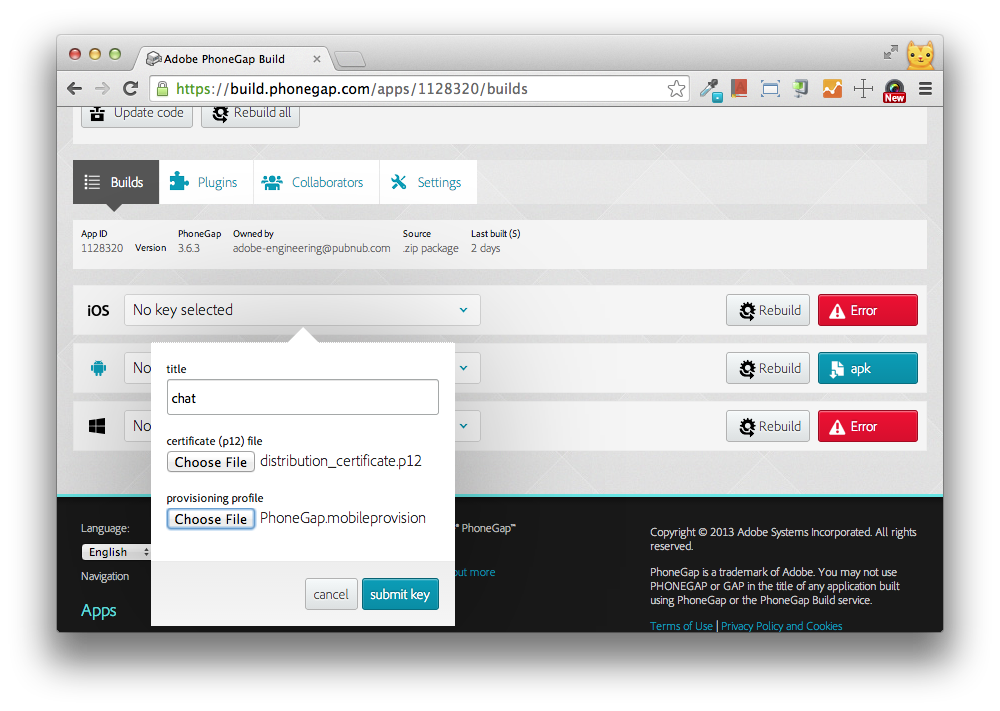
- Click the drodown menu that says No key selected. Change it to add a key
- Enter something, then upload your p12 file, and provisioning file.
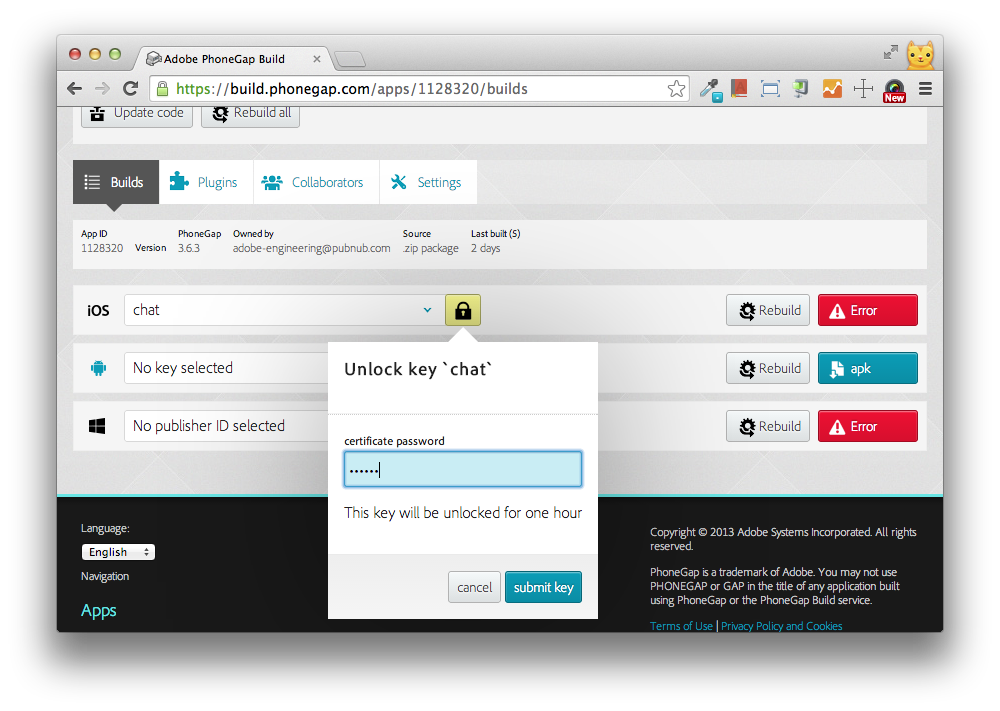
- Now you should see a yellow lock icon. Click it to unlock the key by entering the password you selected earlier.
- Now you should be able to install the ipa file to your device!
Option 2: Full Development with PhoneGap Cordova CLI
Alternatively, instead of building apps using the PhoneGap Build tool, you can install Cordova command-line interface (CLI) tools for full development with taking advantage of the plugins that enable for you to use hardware APIs, push notifications and more, and debugging.
The iOS SDK and iOS emulators should already have been installed in previous step where you download and install Xcode on your Mac, so you are ready to go.
Install Cordova CLI
Installation of the command line interface requires node.js. If you have not, you must install it first.
Install cordova with npm:
$ sudo npm install -g cordova
Create a New Project in Xcode
Create a new project by typing these commands:
$ cordova create simple-chat com.mydomain.chat SimpleChat
$ cd simple-chat
$ cordova platform add ios
Once everything you need for iOS platform is added, try building it by
$ cordova build
Now, under simple-chat/platforms/ios/ you should have a file called, SimpleChat.xcodeproj, so open it in Xcode.
You should be able to choose an emulator to deploy the template app from a menu on the left top.
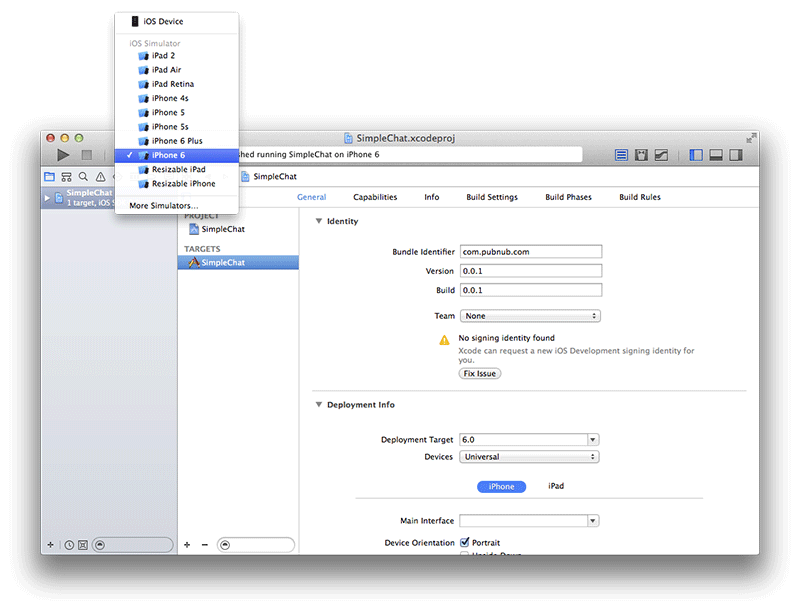
Click the triangle Run button on the top right to launch an emulator.
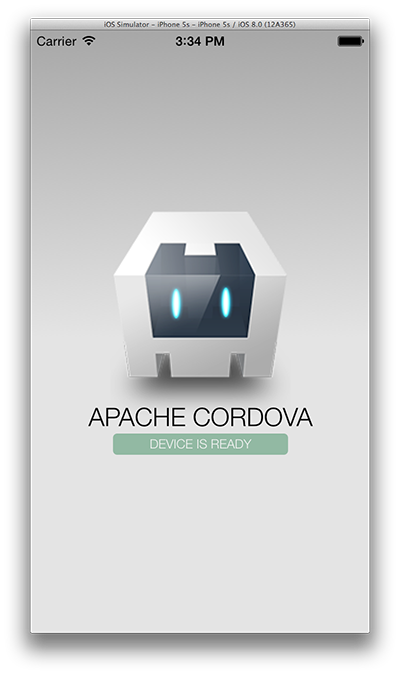
Port Your Web App
In your project folder, you should find a /www/ directory. This is where your web app goes.
Yourindex.html body content goes into the body of/www/index.html. Do not delete or replace head section unless you know what you are doing.
And/js/index.js includes functions that are required for PhoneGap. You just need to call your app functions inonDeviceReady().
Also, you include all your css files and images under /www/.
Set App Icons
We previously set an generic icon in config.xml file for Android. However, the icon that looks good on Android isn't quite esthetically correct on iOS screen, so you may want a designated icon for iOS.
In addition to the generic icon setting, you can include specific icons for each platform.
To define multiple icons to support varieties of device types, please read on PhoneGap Documentation.
Also, check out Apple's iOS Human Interface Guidelines to create beautiful icons.
Deploy to Device
Plug your iOS device to your Mac, and choose the device from the dropdown menu on Xcode. Press Run. You probably get warning message regarding Provisioning Profile, follow the direction.
Hooray, now you have your JavaScript app running on iOS!
Remote Debugging with Safari
When you are working in UIWebView of iOS apps using PhoneGap, you can easily remote-debug on Safari browser on desktop.
- Open your iOS device. Go to Settings > Safari, tap Advanced, then Enable Web Inspector.
- On your desktop Safari browser, enable Developer mode. Go to Preferences > Advanced and teun on Show Develop menu in menu bar.
- Now you should see Develop menu on top tool bar. Connect the device and your computer with a USB cable
- Under Develop, you should see your device name. Select a file from the menu.
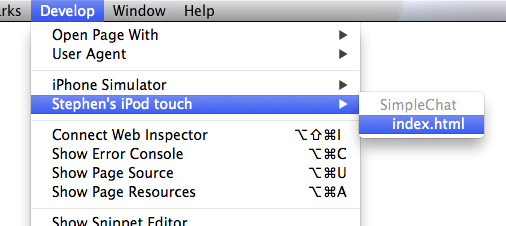
Now you should see Safari's Web Inspector window. You can debug, test performance, and everything you can do with web development!
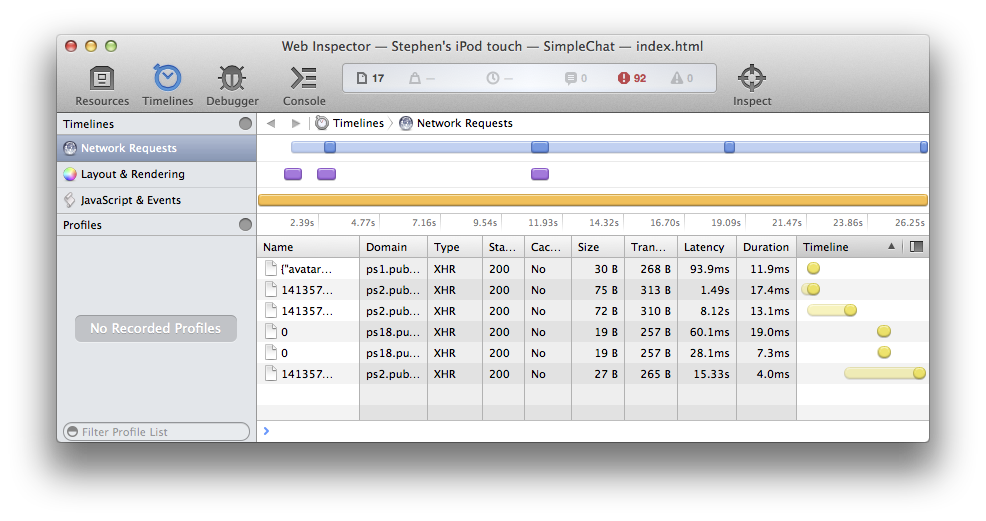
And that's it! To learn more about PhoneGap and Cordova, please visit the official site.
How To Convert Your Blog To An App Using Phonegap
Source: https://www.pubnub.com/blog/converting-your-javascript-app-to-an-ios-app-w-phonegap/
Posted by: jonesgrounted.blogspot.com

0 Response to "How To Convert Your Blog To An App Using Phonegap"
Post a Comment